Mastering Shoelace Tying for High Arches: The Perfect Fit Inside Every Shoe
For individuals with high arches, every step tells a story—one of unique foot mechanics, recovery needs, and comfort demands. One small yet powerful solution that transforms shoe fit is mastering the proper way to tie shoelaces specifically for high arches. This isn’t just about lacing shoes; it’s about adapting technique to support your foot’s natural structure and eliminate pressure points. Many runners, athletes, and everyday wearers with high arches find traditional shoelace tying causes friction, instability, or fatigue—and the good news is: there are proven methods to improve this.The Challenge of High Arch Shoes
High arches change how your foot interacts with footwear. The elevated arch reduces padding on the sole and often leads to reduced shock absorption. Without attention to lacing, tightness in the middle of the shoe can develop, causing discomfort, pressure sores, or even exacerbating foot fatigue during long walks or runs. That’s where intentional shoelace tying for high arches becomes essential—not only for comfort but for injury prevention and enhanced performance.Why Standard Lacing Falls Short
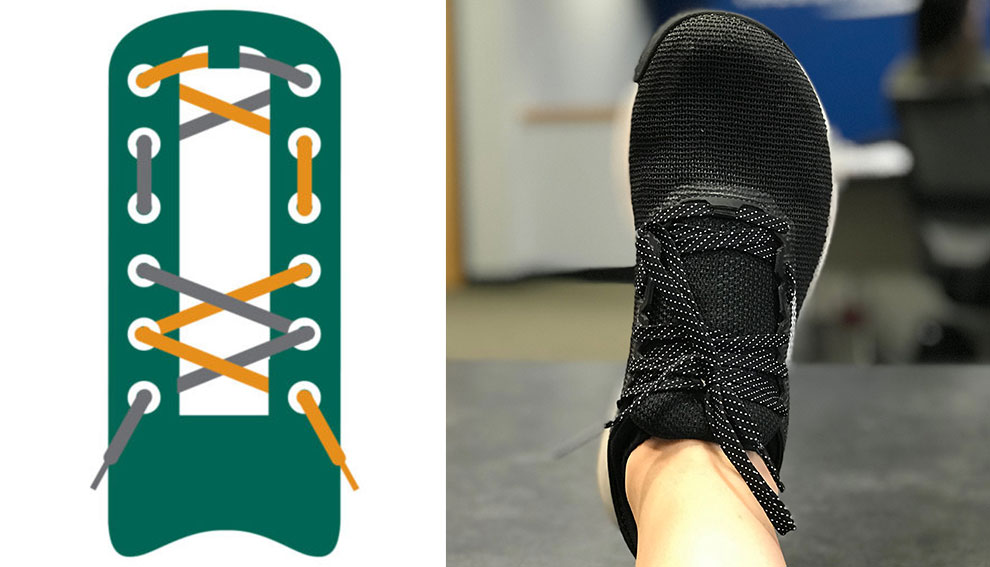
Most people learn a basic criss-cross technique, threading laces through eyelets from one side to the opposite, securing with a simple bow. But this method often leaves the center of the shoe cramped, especially problematic for high arches that need space and balanced support. When lace tension bunches in the midfoot, it restricts movement, reduces breathability, and limits flexibility—key features for active feet.Optimized Lacing Techniques for High Arches
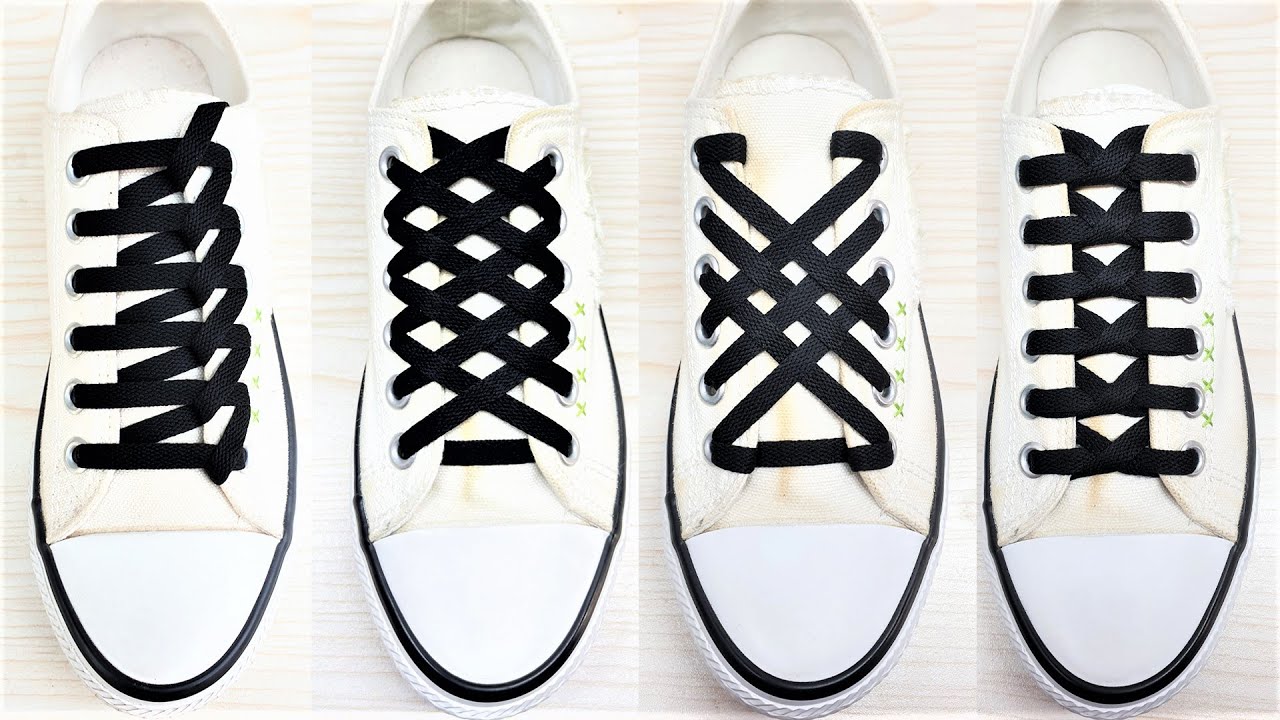
To support high arches effectively, tailoring your shoelace tying is about opening up space and distributing tension evenly. Here are tried-and-true methods:- Criss-Cross with Side-Only Lacing: Lace across the shoe’s midline with the criss-cross pattern, but stop lacing through the center eyelets. Instead, thread the laces tightly only through the outer sides, creating a firmer, more stable structure that cradles the arch without pinching.T
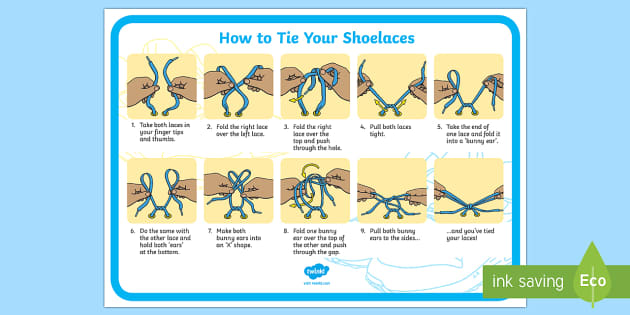
- Heel Lock Lacing: Begin by lacing midfoot to heel, then cross the laces behind the ankle. Tie a simple knot, then loop the excess tails over the last loop to form a triangular knot—a technique that enhances traction and reduces lateral movement, ideal when high arches benefit from tighter, controlled support.
- Wide-Base Lacing: Mainly for athletic shoes, use wider eyelets or a bi-directional criss-cross that spans across a broader section of laces to spread pressure more evenly across the arch area.
- Drop Loop Lacing: Some shoes feature pre-sewn loops lower on the tongue. Draft two main laces through the shoe and tie into a larger loop below, redistributing tension to alleviate midfoot pressure—a classic fix for those with high-arched feet.
- Anti-Rotation Lacing: Secure laces with a double-wrap technique or use micro-knots to lock the loops, giving added stability to the arch zone—great for reducing inward rolling or overpronation zones common in high-arched feet.